ESD Testing - Standard and Methodology
Introduction to ESD Testing
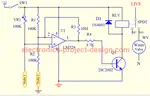
When a charged object contacts another object at a different potential, the charge is equalized between the two objects. A voltage v(t) and current i(t) transient as this occurs is as shown in the figure below.
The amplitude and waveform of the transient depends on the voltage difference and the total impedance in the current path. Pulses will be induced and may create signals that may affect electronic circuits nearby.
A secondary discharge can occur within equipment if the discharge current through the product attempts to take a path which includes an air gap. The voltage across the gap increases until the gap breaks down.
Some of the steps used in design to avoid ESD problems are:
a) Select circuit configurations that are unresponsive to short transients.
b) Lay out the PCB pattern to minimise induced voltages at critical nodes.
c) Prevent unavoidable discharge transients from coupling into circuits and cables.
d) Design enclosures as far as possible to prevent discharges from occurring.
ESD Testing According to IEC 61000-4-2
IEC 61000-4-2 is the standard for ESD testing for immunity. It applies a defined current waveform at a specified voltage level from a hand-held generator known as ESD Gun.
It uses a capacitor supplied from a high voltage supply whose charge voltage is discharged via a series impedance through the point of contact to ground. Two methods of discharges are used. They are contact discharge and air discharge.
ESD Testing - Contact discharge
In the contact discharge method, the stress may be applied directly to the EUT or to a coupling plane adjacent to the EUT. Before each test pulse, the capacitor is charged to the desired level but its voltage is held off the generator's probe by a vacuum relay.
The probe is applied to a suitably chosen point on the EUT or the coupling plane. The generator is then triggered, so that the relay contacts close and the capacitor voltage is applied through the probe to the EUT.
This creates a pulse of current as the voltage discharges through the combined series impedance of the generator, the EUT and the ground plane. This action is repeated the desired number of times, at each location, with the appropriate polarities and levels.
ESD Testing - Air Discharge
The same generator is used for the air discharge method, but with a rounded rather than a pointed probe tip. The capacitor is charged to the desired level as before, but the voltage is now continuously applied to the probe, which is held away from the EUT.
For each test pulse, the tip is brought up to the chosen point on the EUT, smartly, until it touches. Just before this, the air gap between the tip and the EUT will break down and a discharge current will flow, limited as before by the combined series impedance of the generator, the air gap, the EUT and the return path.
Again, the action is repeated the desired number of times, at each location, with the appropriate polarities and levels.
ESD Testing Layout
The ESD pulse has a sub nanosecond risetime and so radio frequency layout precautions are vital.
The test must re-create the fast risetime found in reality, since this is an important parameter in deciding both the path the discharge takes through the EUT and the response of the EUT itself. The ground reference plane (GRP) is an integral part of the setup and the generator’s return lead must be well bonded to it, since this connection forms part of the current return path.
The indirect discharge part of the test uses two other planes, different from the GRP, known as the horizontal coupling plane (HCP) and the vertical coupling plane (VCP). Discharges to these planes simulate the stress caused by the radiated field from real-life discharges to nearby objects.
Each coupling plane is connected to the GRP by a resistor lead, to ensure that any charge bleeds off within a few microseconds. The construction of these leads is critical: there should be a resistor close to each end, so that the length of lead between them is isolated from the connections and stray coupling to it is neutralised.
Although power rating is unimportant, the resistors themselves should withstand a high pulse dV/dt without breaking down, for which carbon composition types are best suited.
For the few tens of nanoseconds of the ESD event, the plane carries the full stress voltage, which is capacitively coupled to the EUT. Any stray capacitance from the plane to objects other than the EUT modifies the plane’s voltage and current waveform and hence the applied stress.
Therefore, it is important to maintain at least 1m clear space around the EUT, which implies some separation of the tabletop setup from walls or other objects.
Equally, the separation from the VCP to the EUT is specified as 10cm; even small variations in this distance can cause large changes in coupling to the EUT, so a convenient means of controlling it, such as plastic 10cm spacers on the surface of the plane, is helpful.
Back To ESD Testing Home Page

Recent Articles
-
Electronics Events
Join the electronics events to enhance your knowledge and network with other professionals in this industry. -
Electronics Design Contest
 Join electronics design contest and win prizes. Test your hardware and software skills against the best designers from the rest of the world.
 -
Garden Watering Circuit
 Experiment and test out this automatic garden watering circuit that will detect the moisture of the soil and on or off the water valve accordingly.
Design and build a battery tester to test dry cell and rechargeable battery with a voltage of less than 2V. Check here.
PCB Prototypes
Make your own printed circuit board and learn the processes involved along the way. More here.
Learn how to dissipate heat from your heat-sensitive electronic components.
Test the reliability of your products to the environment by stressing them in test lab.
Explore the use of 7-Segment Display, 555 Timer, Decade Counter and Binary Adder. Get the circuit.
Construct this simple door bell chime and have fun. Find out more here.
Build this simple home alarm to protect your house from intruders. See the schematic circuit.
New! Comments
Have your say about what you just read! Leave us a comment in the box below.